Installing mods: Difference between revisions
No edit summary |
No edit summary |
||
| Line 74: | Line 74: | ||
| The developer of the mod you are installing likely made a mistake or you downloaded a very old development version of <code>xyz</code>. | | The developer of the mod you are installing likely made a mistake or you downloaded a very old development version of <code>xyz</code>. | ||
|} | |} | ||
[[Category:Guides for mod users]] | |||
Revision as of 09:42, 11 August 2020
This guide describes the most common way of installation of perfectly regular CrossCode mods. Granted, not every mod is equal, some may require additional setup before or after installation, but that must be described in mod's README document. If not - well, this is most likely the mod author's problem. Note that you don't have to read this guide each time you download a new mod as this page is intended for absolute beginners.
Short note about upgrading mods
You can perform mod upgrades by performing the steps described in this guide, but replacing all previous files when unpacking the downloaded mod. However, this is not recommended (by me at least) - instead you should first delete the folder with the previous version of the mod you are upgrading and only then unpack the new version, just in case.
Step 1. Install CCLoader
CCLoader (aka the CrossCode modloader) is required for most mods nowadays to work. Well, it is possible to abuse the DLC/extension system for creating simple asset swaps, but these are its limits - it's definitely not designed for full-fledged modding. CCLoader also provides various tooling for mod authors for selectively patching game content, so that mod authors can put just the changed bits of game files in their mods instead of copying them entirely. The guide about CCLoader installation can be found here.
Step 2. Get the mod files
Most mods are distributed as zip archives. There are two ways to obtain those:
Downloading releases
See also this section of the CCLoader installation guide
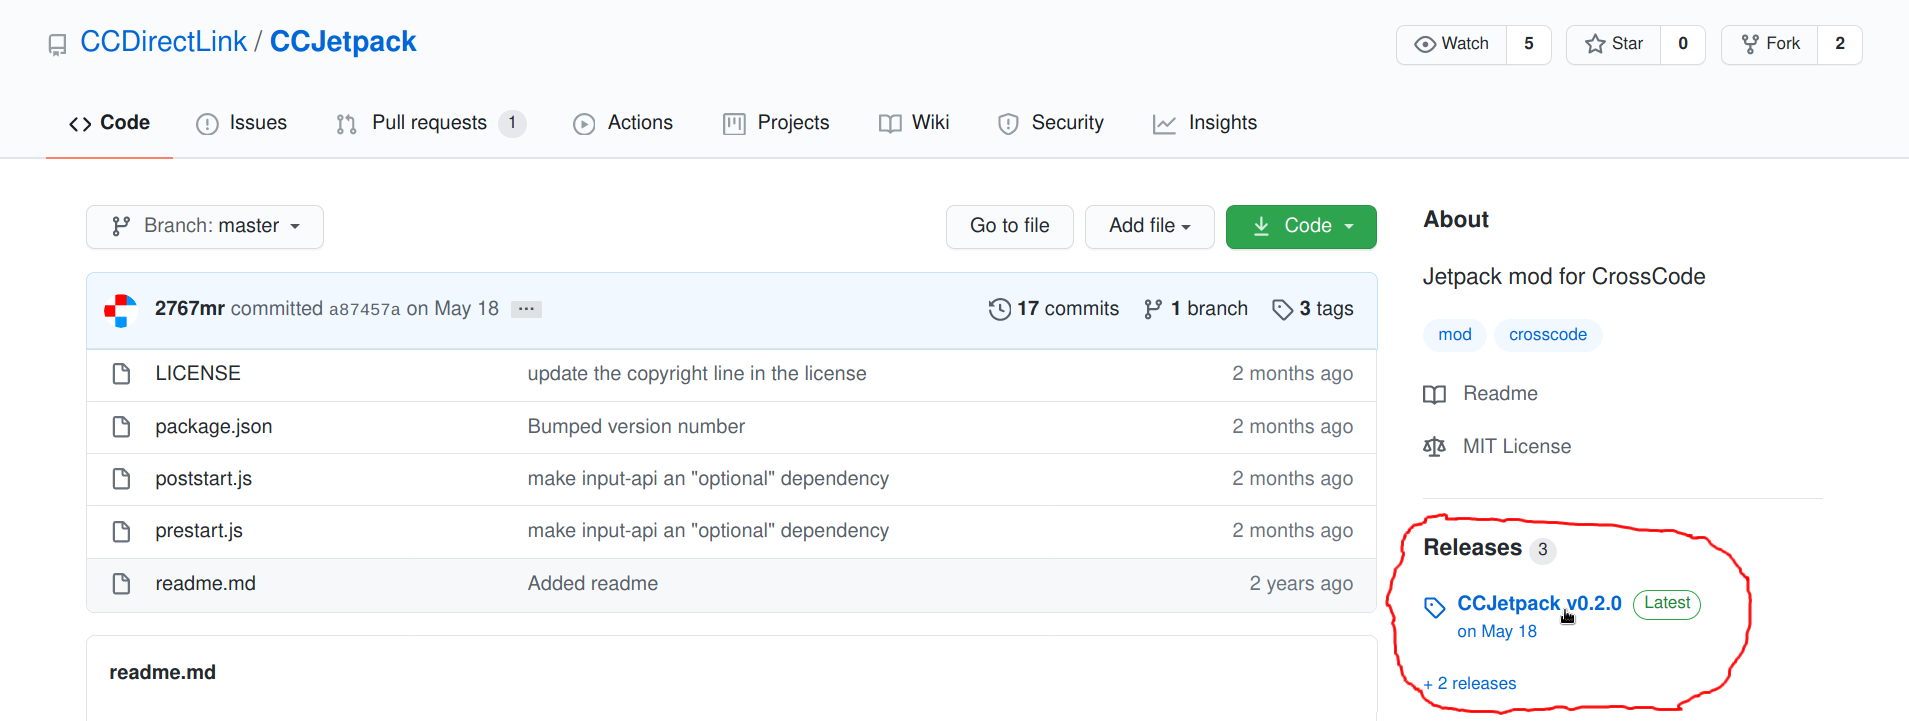
Unless explicitly stated otherwise in the mod's README, when actually downloading mods you should always check first for released versions, or "releases" for short. Most mod authors use GitHub for storing source code and distributing releases where you can access the page with changelogs and downloads through these links:
Pressing on the version marked as "latest" will take you to, unsurprisingly, the page of the latest release, pressing on the Releases (N) or +N releases links at the top and bottom (where N is some number) will take you to a list of all available versions. Mods also often include the following badge in their README which takes you directly to downloads:
On the release page you'll see the section named "Assets". It always includes at least two entries: "Source code (zip)" and "Source code (tar.gz)". If only links for downloading source code are present - don't worry, you can use those to install the mod. Just download whichever archive format you prefer. Otherwise mod authors upload at least zip archives on the downloads page, usually the file name of those includes the mod ID and version.
Downloading source code
Most of the time mod authors publish the releases properly, but when the "releases" page is empty or the link is hidden it can mean one of three things:
- The project is dead.
- The mod is work-in-progress project, or WIP for short. Such mods usually don't have a proper README file. In this case you should contact the author to ask if the mod is usable. You can also potentially help with the development - sometimes mods may need testers.
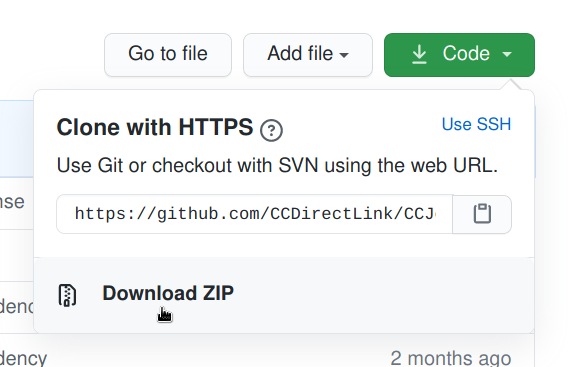
- The author was just lazy to publish releases properly. Most mods don't require compilation or preprocessing of assets or scripts to be loaded into the game and work, so in such cases you can try to download the mod's source code. On GitHub this can be done by pressing the green "code" button with a download icon to the left, and then pressing "download ZIP" in the opened popup:

Beware, however, that sometimes the source code of mods is structured in a weird way, mostly in mods made by ac2pic aka Emileyah, so sometimes you can't just put files of the downloaded archive into your mods folder and call it a day. As a rule of thumb, a folder which contains a file named ccmod.json is most likely a mod. In the case of ac2pic's mods, the mod is usually located in a subfolder named similarly to the mod itself.
Step 3. Unpack the downloaded mod into your mods folder
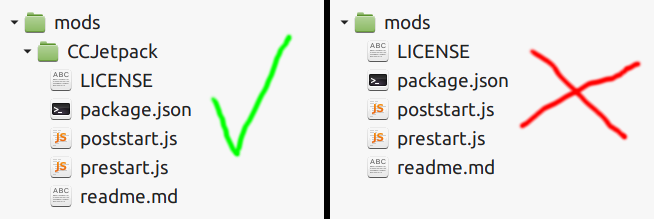
To locate your mods folder you first need to find the CrossCode game files folder, then go to assets, then mods. If the folder mods doesn't exist - create it. Then unpack the mod folder contained in the archive you downloaded there. Be sure to put the mod folder in mods, not the files inside because each mod lives in its own separate folder! You can also ensure that the folder you unpacked contains a file named ccmod.json.
NOTE: these screenshots are a bit outdated (TODO update, include multiple mods to better demonstrate the idea), for example because they doesn't contain ccmod.json, but I hope you get the correct idea.
Step 4. PROFIT!!!
This basically concludes installation of perfectly regular mods.
Common mod installation problems
"Problem with requirements of mod" errors are printed and the mod isn't loaded
Some mods work only on certain versions of CrossCode or CCLoader and some mods require other mods to function (so-called libraries). If these requirements of a given mod aren't met when the game is loaded, the modloader will simply skip this mod and proceed to start the game without it.
| Requirement problem | Explanation |
|---|---|
mod 'xyz' is not installed
|
The mod xyz is a so-called "dependency" of the mod you installed and you should install it as well. Usually dependencies are listed in the mod's README.
|
mod 'xyz' is disabled
|
Unsurprisingly, you have to enable the mod xyz to get the installed mod working.
|
mod 'xyz' is not loaded
|
If there is a problem in the chain of dependencies, then all mods in that chain aren't loaded. See the error which caused xyz to not be loaded.
|
version of xyz is not in range abc
|
The installed mod is compatible with a specific range of versions of xyz, try downgrading or upgrading xyz.
|
mod 'xyz' doesn't have a version
|
The developer of the mod you are installing likely made a mistake or you downloaded a very old development version of xyz.
|


